
Before the plasterer arrives
Create space, define choices and coordinate work.
On this page
Your plastering, step by step.
This is what the process looks like: six drawn steps from a first plan to a well-kept wall or a smooth ceiling.

Tell us about your plans
Send overview photos and an assessment of the wall and ceiling meters. Discuss the desired finish and record the work.
Prepare the room
Make space and protect floors, window frames and fixed parts according to appointment. Tune who takes care of the preparation.
Check the substrate
Allow adhesion, damage and material transitions to be assessed. The chosen structure determines the repair and any pre-treatment.
Apply the plaster
The agreed layers are applied and finished. Smooth, ready to be covered or with structure: the desired appearance is the starting point.
Let it dry well
Follow the agreements on ventilation and indoor climate. Check the actual condition before paint or wallpaper is applied.
Check the finish and plan the next step
Check the agreed surfaces and connections. Record any points and tune the transfer to paint or decorate.
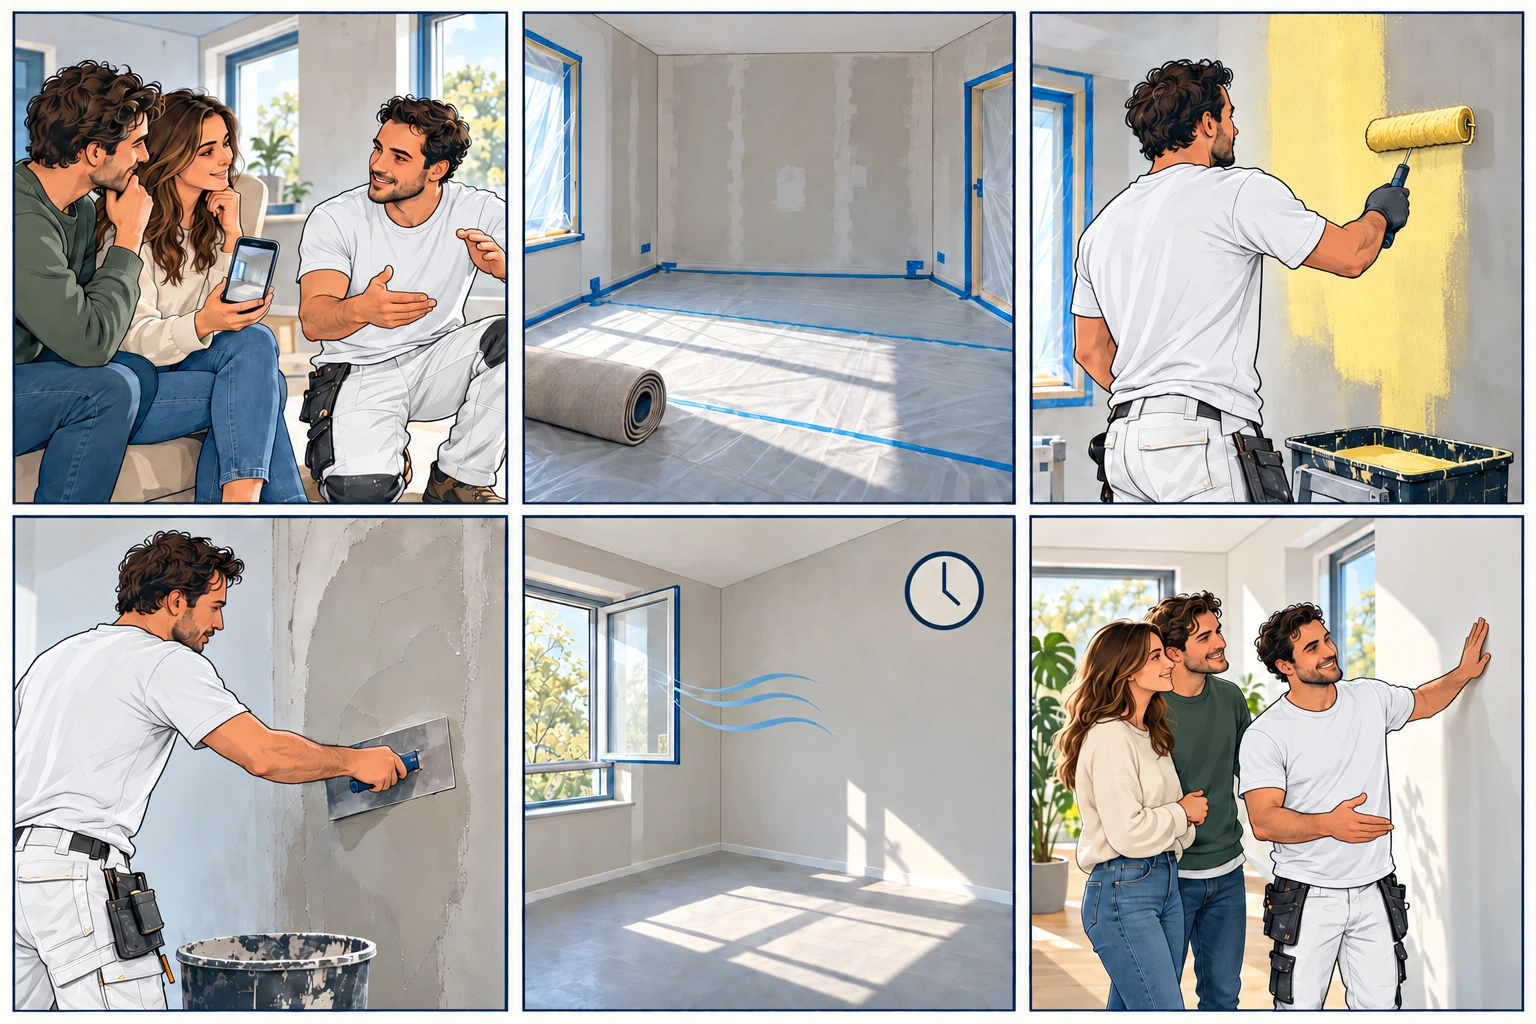
Designed step-by-step plan. The precise work and drying time are tailored to your home and the chosen materials.
Take a closer look at the subject.
Illustrative images in preparation, substrate or finish.
A practical preparation plan for your home
Before the work: confirm the scope
Check the rooms together or work with an overview of the agreed surfaces. Mark which walls and ceilings are done and note what stays. Discuss boards, radiators, switching material, lamps and window frames. Ask who disassembles parts and who returns them later. Let installation changes finish first if they re-slots or cause holes.
Make room without changing the substrate
Move loose furniture and take care of a free route to the workplace. Tune protection of floors and fixed parts with the performer. Do not start sanding, sanding or removing layers on your own initiative when what is not clear what is needed. After clearing, hidden damage can be visible; let it be seen before the execution.
On the day: review the agreed work
Check accessibility, necessary facilities and the space for materials. Name vulnerable parts and decide which rooms can continue to be used. Also consider pets and other activities. Ask at the end what follow-up steps are needed, how the space is ventilated and when the next performer should assess the substrate.
This is what you discuss in advance
- Capture the workspace and division of labour.
- Make a free route and plenty of workspace.
- Have any abnormalities checked before starting.
- Ask for drying and the next finish.
Create space, define choices and coordinate work.
Make clear agreements in advance
Choose what work the craftsman does for plastering and what you prepare for yourself. Think of clearing the space, removing wallpaper and protecting floors and fixed parts.
Show the substrate
In addition to overview photos, send details of cracks, loose layers and moisture spots. Do not hide such places under a new layer. The substrate and possible causes must be assessed first.
Align the practical issues
Discuss free access, work height and availability of electricity and water. Plan electricity, window frames, floors and painting in the correct order with the professionals involved.
Discuss your situation
An article gives general explanation. The correct execution follows from the assessment of your space, the chosen materials and the manufacturer's requirements.
Ask your question.Create a preparation overview
Write down which furniture and parts must be removed, who provides protection and which installation work is still running. Tune your own removal work with the performer. Have cleared walls revisited, because additional damage can be seen under old layers.
- Describe the existing condition.
- Make the desired result concrete.
- Capture preparation and follow-up.
- Save product data and appointments.
Deepen this topic
Removing wallpaper before plastering
First tune which layers should be completely removed and how the substrate is protected. wallpaper removal can make hidden damage visible.
Read more →Planning plastering during a renovation
The best order of work combines demolition, installations, substrate, plastering and finishing. Tune those steps before a execution date is fixed.
Read more →More answers on this topic
Should skirts be removed in advance?
This depends on the intended result and the existing situation. Speak explicitly whether to work up to, behind or above the plinth and who is disassembling.
Do I have to tape everything myself?
Only by appointment. Let us indicate which protection is appropriate and who checks that floors, window frames and fixed parts are well protected.
Create one short message per space
A home doesn't always have to be completely empty, but the workspace has to fit in with what has been agreed. Please explain to each room which furniture, doors, radiators or separate parts are removed.
A useful checklist
- Record the work order, including installation work that must be completed first.
- Clear walkways and talk storage, water, power and access.
- Protect or remove items according to the appointments made.
- Have the readiness checked before the agreed implementation phase starts.
Discuss your plastering project.
Send your wishes, images and estimated dimensions. We will check which preparation and finishing suits your home.